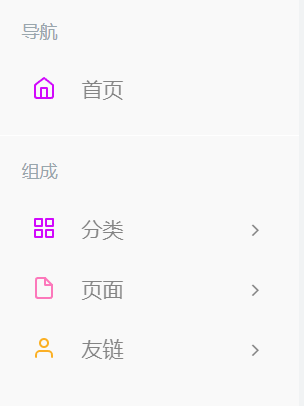
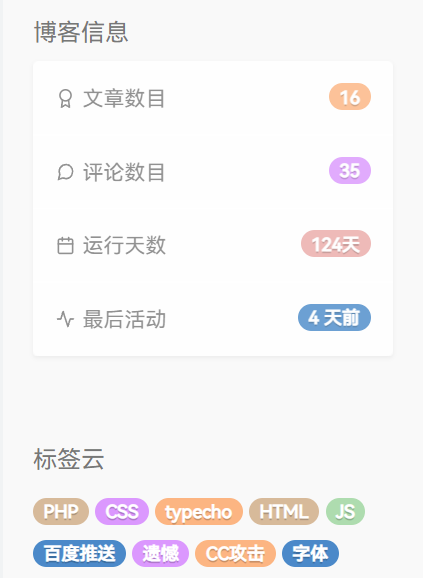
Loading... 1. 介绍 3.19之前一直使用的是**Hran**大佬开发的主题,今天换成了**友人c**大佬开发的主题,这个文章记录一下主题的美化记录,避免更新后主题美化让人奔溃 #### 左侧导航多彩图标 左侧导航多彩图标  步骤 `开发者设置➡自定义JavaScript` `PJAX➡PJAX回调函数` ```javascript let leftHeader=document.querySelectorAll("span.nav-icon>svg,span.nav-icon>i");let leftHeaderColorArr=["#FF69B4","#58c7ea","#E066FF","#FF69B4","#FFA54F","#90EE90","#0043ff","#cc00ff","#8e7cc3","#A0522D","#FF7256","#FFA500","#8B0000","#7CFC00","#4EEE94","#00FFFF","#EE0000"];leftHeader.forEach(tag=>{tagsColor=leftHeaderColorArr[Math.floor(Math.random()*leftHeaderColorArr.length)];tag.style.color=tagsColor}); ``` 复制 #### 右侧导航图标美化 右侧导航图标美化  步骤 `开发者设置➡自定义CSS` ```javascript /*右侧导航栏*/ .sidebar-icon svg.feather.feather-thumbs-up{color: #ff0000;} .sidebar-icon svg.feather.feather-message-square{color:#495dc3;} .sidebar-icon svg.feather.feather-gift{color:#52DE97;} ``` 复制 #### 主题标题居中 主题标题居中  步骤 `开发者设置➡自定义CSS` ```javascript /*主题标题居中*/ header.bg-light.lter.wrapper-md { text-align: center; } ``` 复制 #### 多彩标签云 右侧博客信息及标签美化  步骤 `开发者设置➡自定义JavaScript` `PJAX➡PJAX回调函数` ```javascript let tags = document.querySelectorAll("#tag_cloud-2 a"); let infos = document.querySelectorAll(".badge"); let colorArr = ["#428BCA", "#AEDCAE", "#ECA9A7", "#DA99FF", "#FFB380", "#D9B999"]; tags.forEach(tag => { tagsColor = colorArr[Math.floor(Math.random() * colorArr.length)]; tag.style.backgroundColor = tagsColor; }); infos.forEach(info => { infosColor = colorArr[Math.floor(Math.random() * colorArr.length)]; info.style.backgroundColor = infosColor; }); function addNumber(a) { var length = document.getElementById("comment").value.length; if(length> 0){ document.getElementById("comment").focus() document.getElementById("comment").value += '\n' + a + new Date }else{ document.getElementById("comment").focus() document.getElementById("comment").value += a + new Date } } ``` 复制 #### 右侧滚动条美化 右侧滚动条美化 步骤 `开发者设置➡自定义CSS` ```javascript /*定义滚动条高宽及背景 高宽分别对应横竖滚动条的尺寸*/ ::-webkit-scrollbar { width: 8px; height: 6px } /*定义滚动条轨道*/ ::-webkit-scrollbar-track { background-color: transparent; -webkit-border-radius: 2em; -moz-border-radius: 2em; border-radius: 2em } /*定义滑块 内阴影+圆角*/ ::-webkit-scrollbar-thumb { background-color: #30B07F; background-image: -webkit-linear-gradient(45deg,rgba(255,255,255,.4) 100%,transparent 100%,transparent 50%,rgba(255,255,255,.4) 50%,rgba(255,255,255,.4) 75%,transparent 75%,transparent); -webkit-border-radius: 2em; -moz-border-radius: 2em; border-radius: 2em } ``` 复制 #### 全站打字烟花特效 全站打字烟花特效 步骤 `开发者设置➡自定义输出body 尾部的HTML代码` ```javascript <script type="text/javascript"src="https://js.qninq.cn/js/commentTyping.js"></script> ``` 复制 #### 粗体上色 粗体上色 步骤 `开发者设置➡自定义CSS` ```javascript /* 粗体上色 */ strong{ color: rgb(230, 145, 56); } ``` 复制 #### 文章版式阴影 文章版式阴影 步骤 `开发者设置➡自定义CSS` ```javascript /*文章版式阴影*/ .panel{ box-shadow: 1px 1px 5px 5px rgba(232, 212, 220, 0.35); -moz-box-shadow: 1px 1px 5px 5px rgba(255,112,173,0.35); } .panel:hover{ box-shadow: 1px 1px 5px 5px rgba(232, 212, 220, 0.35); -moz-box-shadow: 1px 1px 5px 5px rgba(255,112,173,0.35); } .panel-small{ box-shadow: 1px 1px 5px 5px rgba(232, 212, 220, 0.35); -moz-box-shadow: 1px 1px 5px 5px rgba(255,112,173,0.35); } .panel-small:hover{ box-shadow: 1px 1px 5px 5px rgba(232, 212, 220, 0.35); -moz-box-shadow: 1px 1px 5px 5px rgba(255,112,173,0.35); } .app.container { box-shadow: 0 0 30px rgba(255, 112, 173, 0.35); } ``` 复制 #### Logo扫光效果 Logo扫光效果 步骤 `开发者设置➡自定义CSS` ```javascript /* logo扫光 */.navbar-brand{position:relative;overflow:hidden;margin: 0px 0 0 0px;}.navbar-brand:before{content:""; position: absolute; left: -665px; top: -460px; width: 200px; height: 15px; background-color: rgba(255,255,255,.5); -webkit-transform: rotate(-45deg); -moz-transform: rotate(-45deg); -ms-transform: rotate(-45deg); -o-transform: rotate(-45deg); transform: rotate(-45deg); -webkit-animation: searchLights 6s ease-in 0s infinite; -o-animation: searchLights 6s ease-in 0s infinite; animation: searchLights 6s ease-in 0s infinite;}@-moz-keyframes searchLights{50%{left: -100px; top: 0;} 65%{left: 120px; top: 100px;}}@keyframes searchLights{40%{left: -100px; top: 0;} 60%{left: 120px; top: 100px;} 80%{left: -100px; top: 0px;}} ``` 复制 #### 响应时间和访客总数 响应时间和访客总数 步骤 `将以下代码放到/usr/themes/handsome/libs/Content.php的class content{}前` ```javascript /*访问总量*/ function theAllViews(){ $db = Typecho_Db::get(); $row = $db->fetchAll('SELECT SUM(VIEWS) FROM `typecho_contents`'); echo number_format($row[0]['SUM(VIEWS)']); } /*响应时间*/ function timer_start() { global $timestart; $mtime = explode( ' ', microtime() ); $timestart = $mtime[1] + $mtime[0]; return true; } timer_start(); function timer_stop( $display = 0, $precision = 3 ) { global $timestart, $timeend; $mtime = explode( ' ', microtime() ); $timeend = $mtime[1] + $mtime[0]; $timetotal = number_format( $timeend - $timestart, $precision ); $r = $timetotal < 1 ? $timetotal * 1000 . " ms" : $timetotal . " s"; if ( $display ) { echo $r; } return $r; } ``` 复制 `然后将以下代码放到/usr/themes/handsome/component/sidebar.php内,找到博客信息添加即可` ```javascript <li class="list-group-item text-second"> <span class="blog-info-icons"> <i data-feather="users"></i></span> <span class="badgepull-right"> <?php echo theAllViews();?></span><?php _me("访客总数") ?></li> <li class="list-group-item text-second"> <span class="blog-info-icons"> <i data-feather="refresh-ccw"></i></span> <span class="badgepull-right"> <?php echo timer_stop();?></span><?php _me("响应耗时") ?></li> ``` 复制 #### 栏目列表美化 栏目列表美化 **美化前提:文章头图样式选择选择小版式** 步骤 `/usr/themes/handsome/libs/Content.php`955行到960行代码如下: ```javascript <div class="panel-small single-post box-shadow-wrap-normal"> <div class="index-post-img-small post-feature index-img-small"> <a href="{$parameterArray['linkUrl']}"> <div class="item-thumb-small lazy" {$backgroundImageHtml}></div> </a> </div> ``` 复制 替换为: ```javascript <div class="panel-small single-post box-shadow-wrap-normal tt-small-blur"> <div class="index-post-img-small post-feature index-img-small tt-left-box"> <a href="{$parameterArray['linkUrl']}"> <div class="item-thumb-small lazy tt-left-img" {$backgroundImageHtml}></div> </a> </div> <div class="tt-blur-img" {$backgroundImageHtml}></div> ``` 复制 `设置外观→开发者设置→自定义CSS` ```javascript /*栏目列表美化*/ .tt-small-blur{position:relative;z-index:1;display:flex;overflow:hidden;background-color:#333;color:#fff;} .tt-small-blur .tt-left-box{z-index:1;-webkit-clip-path:polygon(0 0,94% 0,100% 100%,0 100%);clip-path:polygon(0 0,94% 0,100% 100%,0 100%);} .tt-small-blur .tt-left-img{width:100%;height:100%;-o-object-fit:cover;object-fit:cover;} .tt-small-blur .tt-blur-img{position:absolute;top:0;right:0;bottom:0;left:0;z-index:0;width:100%;height:100%;background-position:center;background-size:cover;transform:scale(1.4);-o-object-fit:cover;object-fit:cover;-webkit-filter:blur(1.275rem) brightness(.83);filter:blur(1.275rem) brightness(.83);} .tt-small-blur .post-meta{z-index:1;display:flex;color:inherit;flex-direction:column;justify-content:space-between;} .tt-small-blur .text-title{color:inherit;} .tt-small-blur .post-meta h2,.tt-small-blur .post-meta p{text-shadow:.1875rem .1875rem .3125rem #333;letter-spacing:.09rem;} .tt-small-blur .text-muted{color:inherit;} .tt-small-blur .post-meta {padding: 30px 30px 15px 30px;} @media (max-width:500px){.tt-small-blur .index-post-title{display:-webkit-box;display:-moz-box;overflow:hidden;margin-bottom:2px;height:48px;text-overflow:ellipsis;white-space:normal;word-wrap:break-word;line-height:1.4;-webkit-line-clamp:2;-webkit-box-orient:vertical;-moz-line-clamp:2;-moz-box-orient:vertical;word-break:break-all;}} @media (max-width:500px){.tt-small-blur .summary{display:none;}} @media (max-width:380px){.tt-small-blur .post-meta{padding:10px 15px;}} @media (min-width:768px) and (max-width: 1199px){.tt-small-blur .summary {height: 55px;}.tt-small-blur .line-lg {margin-top: 1px;margin-bottom: 1px;}} ``` 最后修改:2023 年 01 月 15 日 © 允许规范转载 打赏 赞赏作者 支付宝微信 赞 1 如果觉得我的文章对你有用,请随意赞赏